Star Ferry Musing #149. Maker. Ceramic Techniques
Written by Robert Wu for his family and friends
To read all 149 SFM articles, please access http://www.starferrymusings.com/
If you wish to discontinue receiving SFM articles, please drop me a line.
如您不想收這些文章, 請告知.
**********************************************
Seven years ago, Sally and I read in a newspaper that a senior center offered ceramics classes. We responded and discovered our favorite hobby that currently occupies three days a week of our retired life.
Sally is a natural talent with sculpting figures and faces. This was the very first statue she sculpted with a live model.
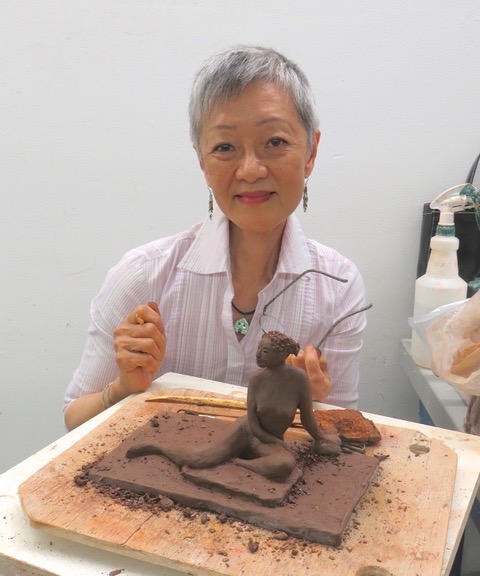
I play with clay to make items as I fancy. Sharing a favorite hobby enhances our lives tremendously.
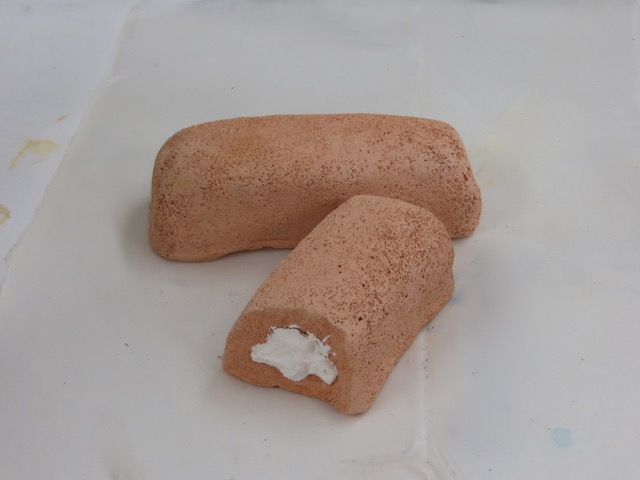
Four years ago, I learned that my comfort food, the packaged cake Twinkies, would be discontinued. To commemorate my childhood sweet tooth, I made these simple ceramic pieces. I focused on making ceramic food items ever since.
Colors and coatings:
For ceramic food items to be attractive, they have to be properly colored. When fired, the resultant colors of underglaze “paints” may be unpredictable depending on the temperature of the kiln and the clay they are applied on. I have learned to consistently use white clay and firing only at “cone 05” temperature of about 1,900F. Even then, only 50% of my colors and coatings are successful from the fickle firing process. I tell people I frequently pray to the kiln god.
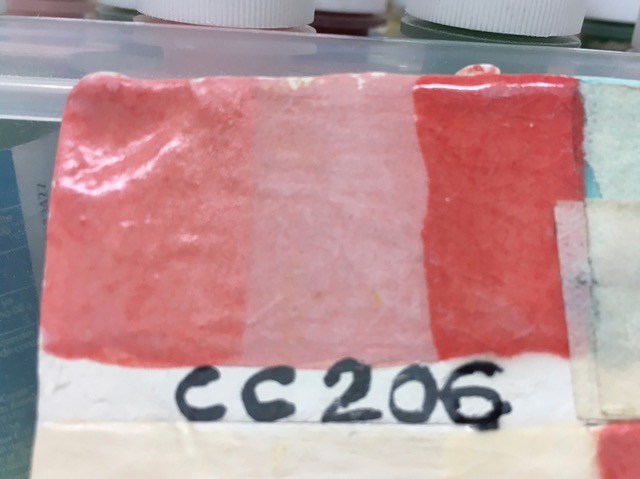
I made sample slabs of my underglaze colors as a guide for my work.
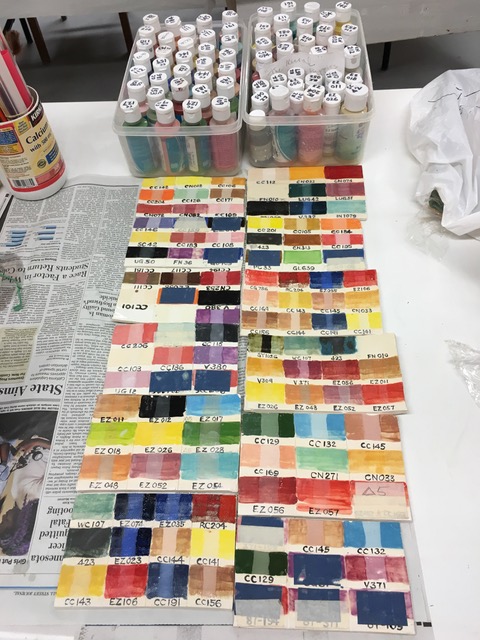
Each underglaze color was applied on a piece of fired clay (bisque), then I cover the right portion with clear gloss glaze (basically a thin film of glass); and the left portion with clear satin glaze. The two glazed portions give the color depth and body while the center portion without glaze is flat and dull. Depending on the final effect I seek, I apply glazes selectively.
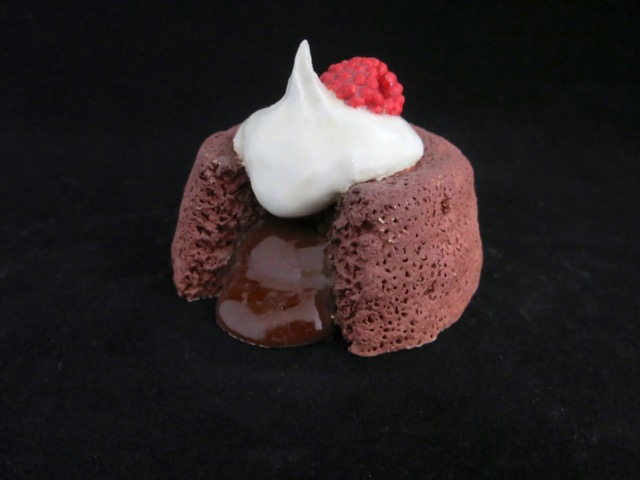
The cake body and chocolate filling of this lava cake are both colored with “walnut brown” underglaze color. I left the cake portion without any glaze, and the texture looks like cake. The chocolate filling is coated with clear gloss glaze and it seems to ooze lusciousness.
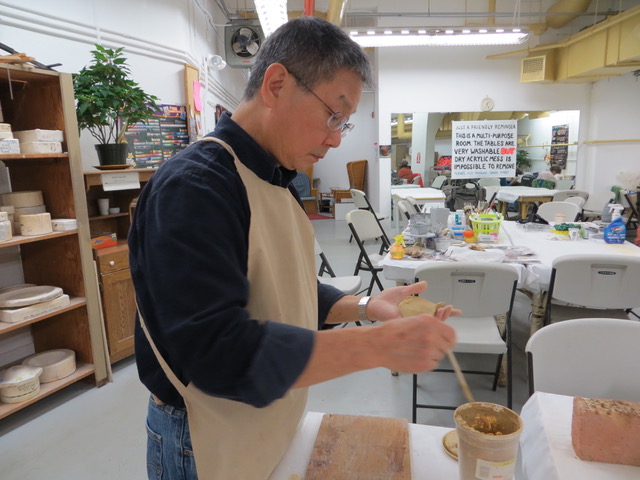
I usually apply coatings with small pint brushes. Sometimes I use different application techniques such as a spray.

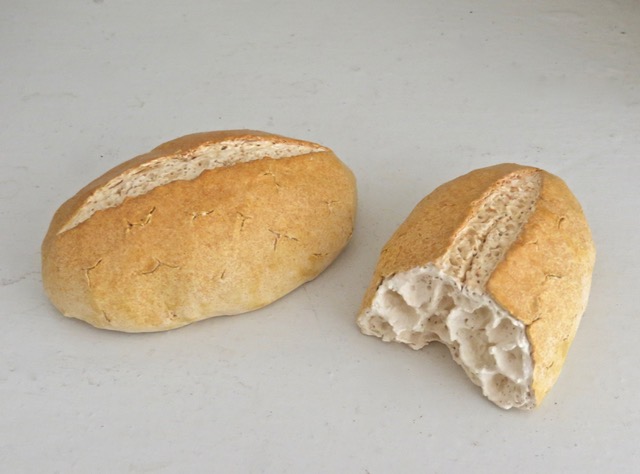
Spraying underglaze color on these baguettes gives them gradually deepening color, mimicking the crust.
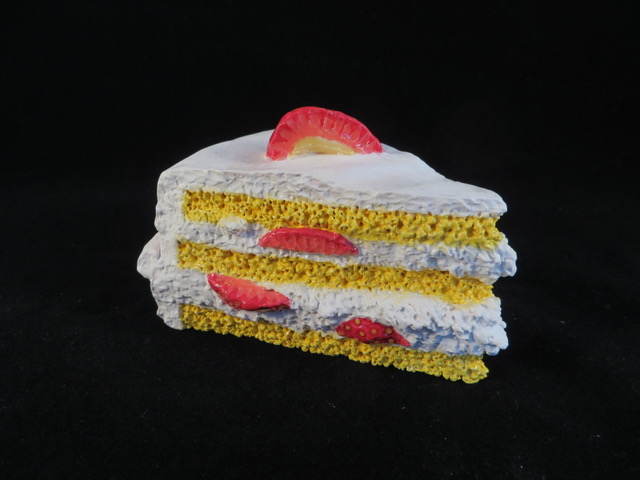
To find inspiration, I surf the web for photos of beautiful food items. This picture of a piece of strawberry shortcake is very enticing.
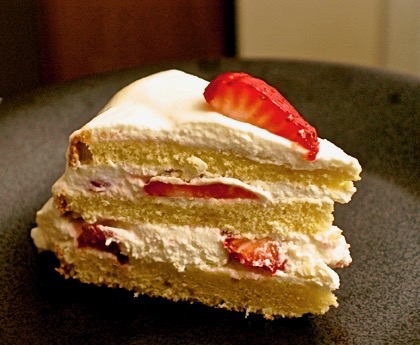
I strived to recreate the rich textures of the cake and whipped cream. The brilliant color combination renders this sculpture mouth-wateringly tempting.
Firing Process:
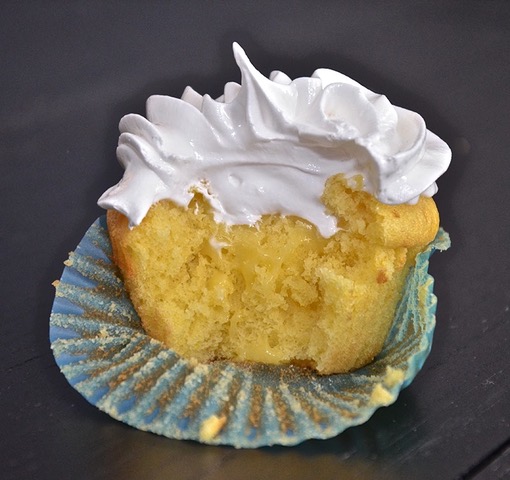
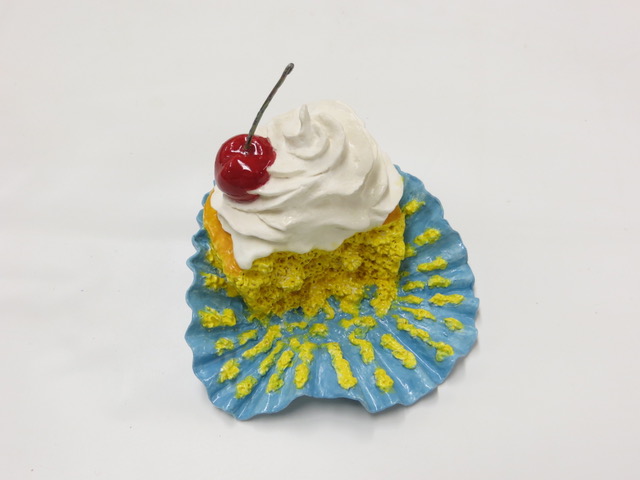
To make a ceramic sculpture of a cupcake, I first found a good photo of a delicious cupcake as reference.
I sculpted wet clay into the shape I want.
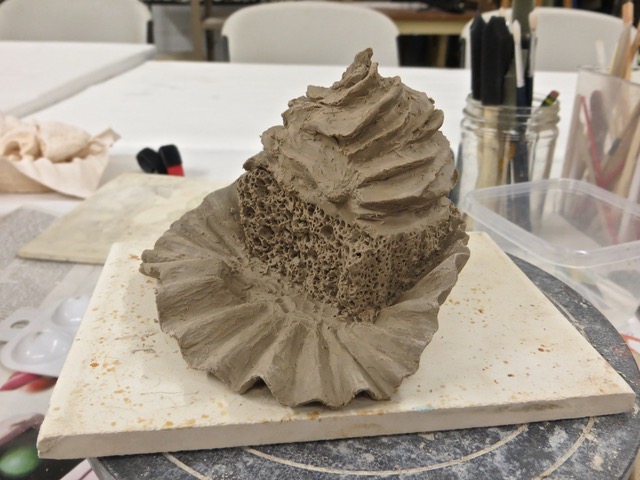
After firing the dried clay in a kiln at cone 05 (about 1,900F), it became a bisque (brick).
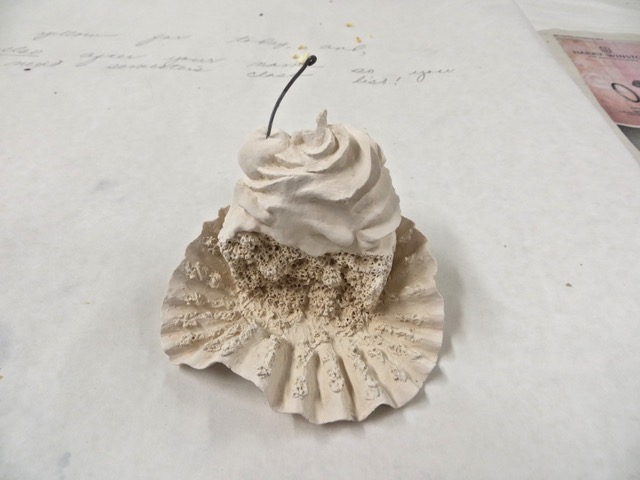
Selecting underglaze colors and painting with fine brushes, the bisque is colored. I then applied clear satin glaze on the cake and paper since these textures are colorful but a little flat; and clear gloss glaze on the cherry to show its glossy red. The whipped cream was left unglazed since whipped cream is not shiny at all. The cherry stem was made with a special alloy wire that does not oxidize at high temperature.
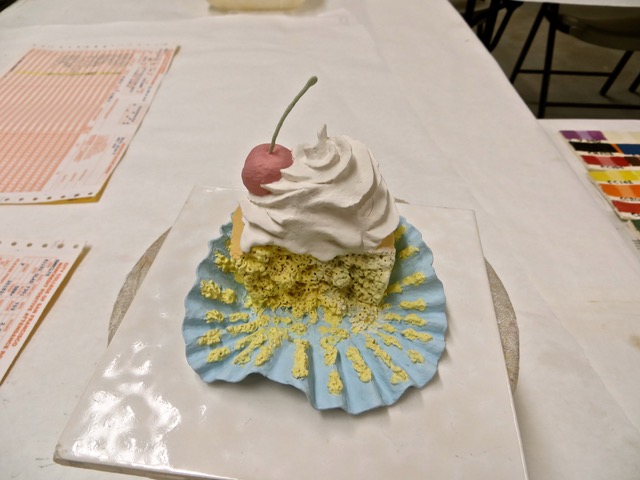
The colored and glazed bisque was fired a second time at cone 05 to produce this finished product. This is one of my favorite pieces.
Effects:
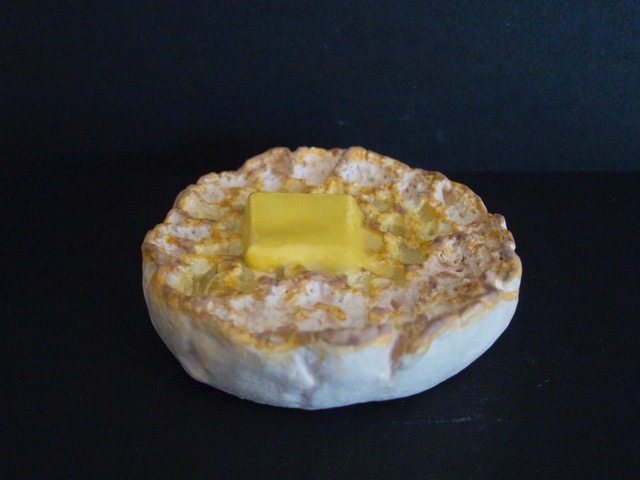
Sculpting the pat of butter with sharp and rounded edges, and coloring it and adjacent bread with yellow color renders the melting butter believable and realistic.
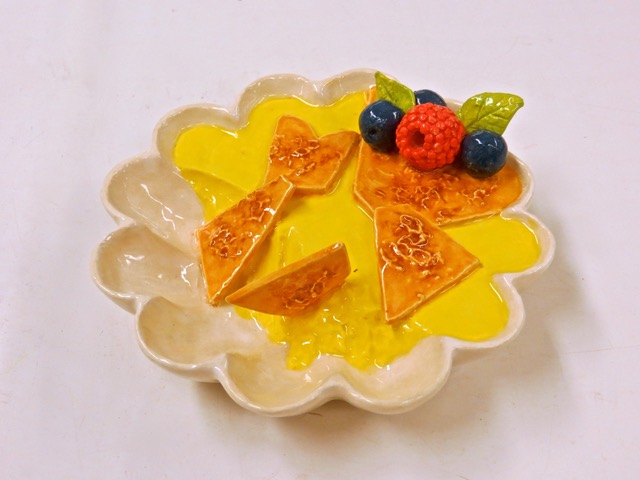
A creme brulee-multilobed dish sculpture was made to simulate the contained creamy custard.
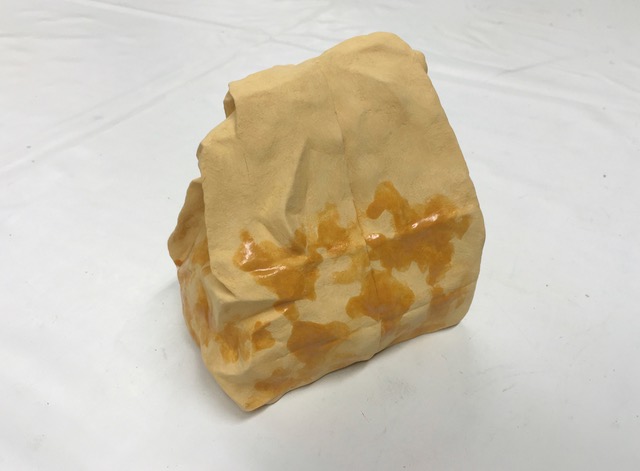
I made a doggie bag to suggest food without showing food. The food within can be cuisine from any culture, as implied by the greasy world map.
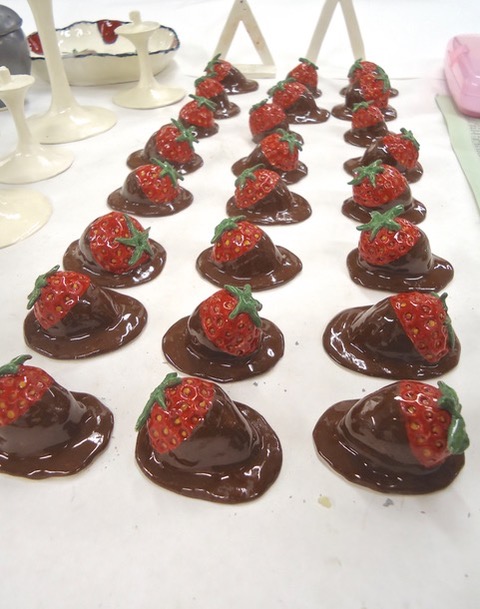
I found making chocolate dipped strawberries to be relatively easy. I gave them to the staff and volunteers of the senior center as my tokens of appreciation.
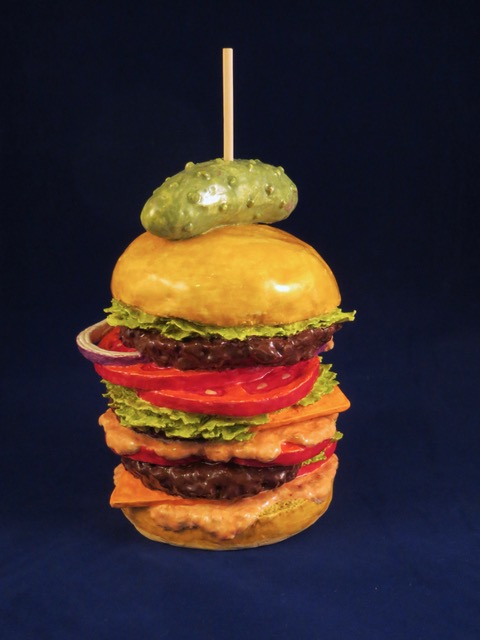
I became ambitious and made outlandish and improbable food items. I named this Triple Bypass Burger.
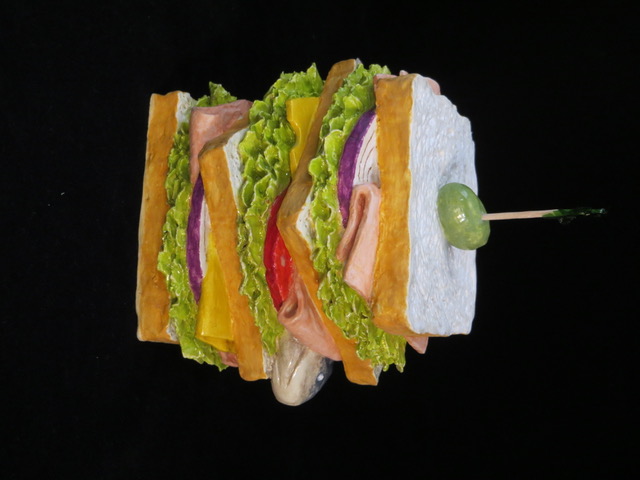
Folks of my generation may recognize this as a sandwich made and eaten by Dagwood in the Blondie comics.
Dynamism and Motions:
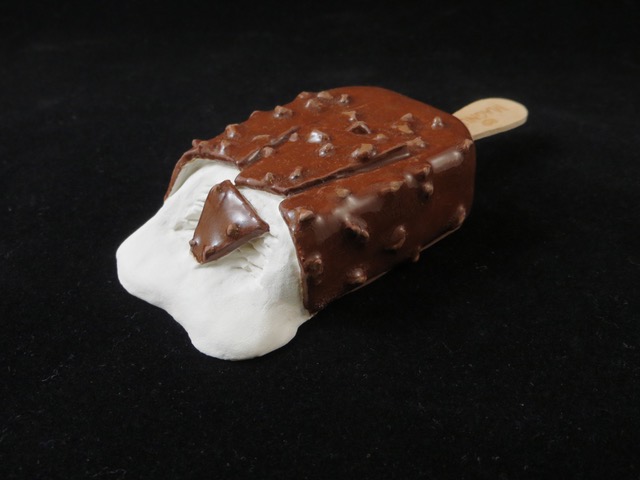
I wanted to add action to my creations and made this half-eaten and melting ice cream bar.
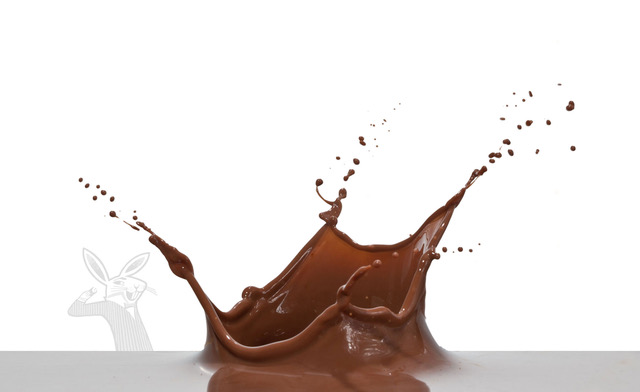
Nothing denotes motion better than splashing liquid. I found this photo of splashing chocolate milk as a reference.
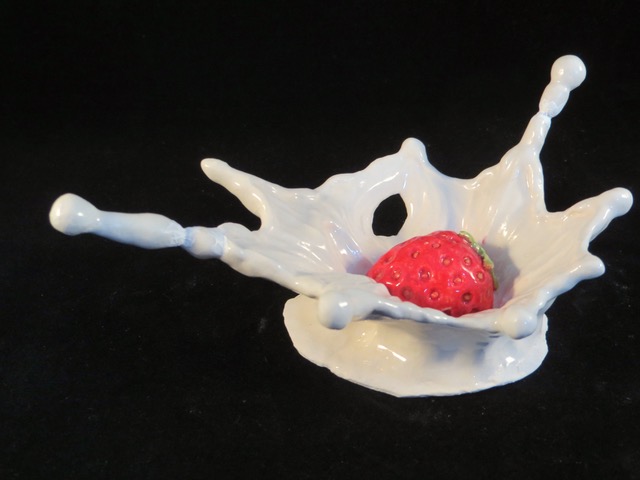
Milk splashed by a dropped strawberry.
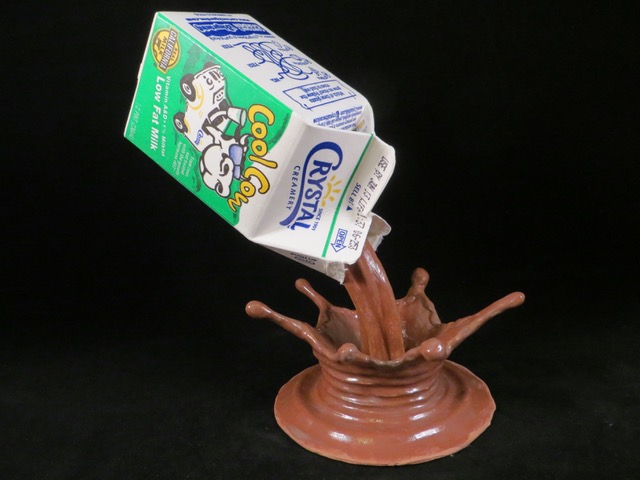
I combined a paper milk carton with a ceramic chocolate milk splash to create a multi-media piece. The message: Outward appearance may not truthfully describe the contents within.
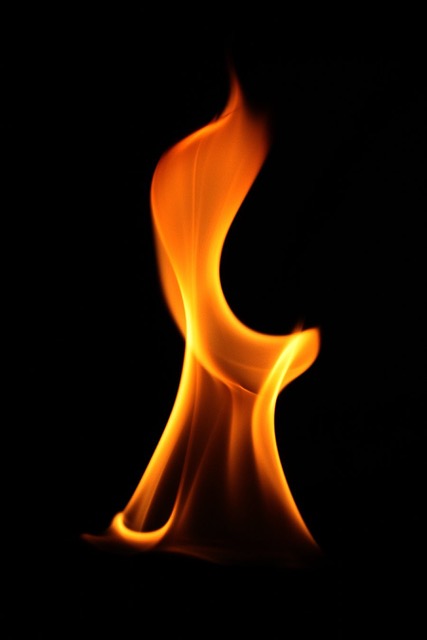
Flickering fire is fleeting and enchanting. It is a challenge to craft from clumsy clay to resembles this dancing ethereal flame.
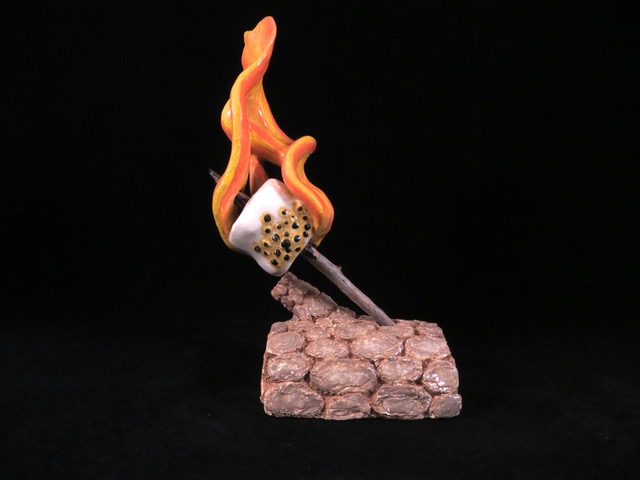
I made a flaming marshmallow that seems to capture the essence of the flame.
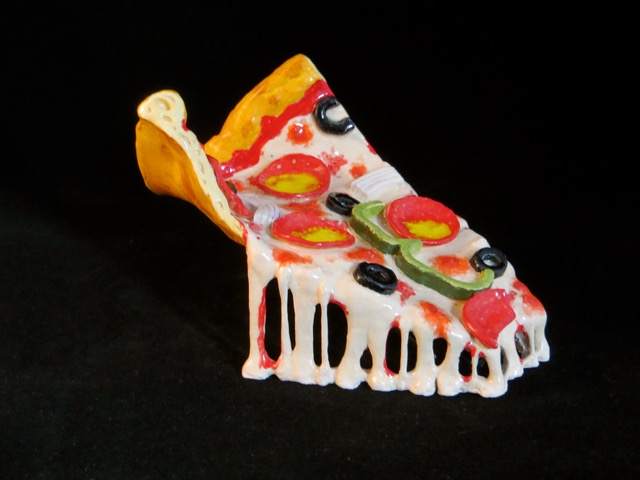
When I was young, I bit into piping hot pizza when melted cheese would stick to my upper palate, causing me to jump around in pain. I made this slice of New York pizza with dripping melted cheese to commemorate my experience.
Sprinkles and Attachments:
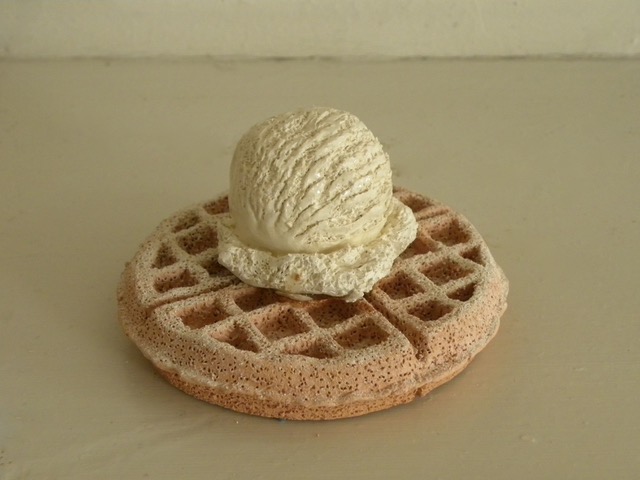
Once, I tried to mimic powder sugar on waffle by dusting powdered dry clay on a wet clay waffle. But the powdered dry clay would become hydrated and melt into the wet clay substrate. The powdered clay became a film of whiteness on the waffle and lose its powdery texture. This experiment was a failure.
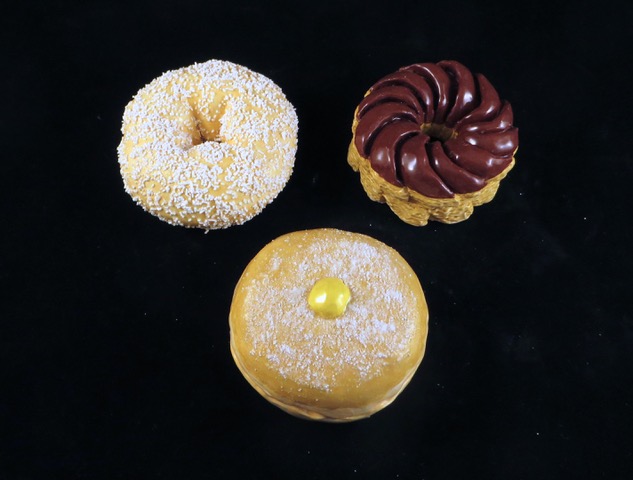
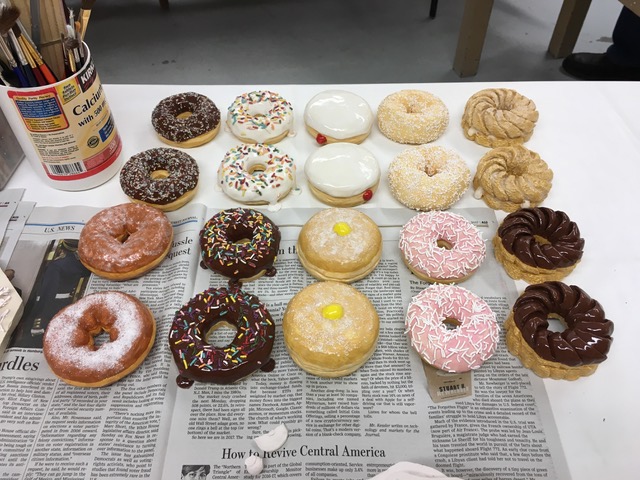
I then experimented by first firing white clay into bisque before grinding it into bits. As the bisque bits are already fired and matured, they would remain unchanged when they get wet. I used sieves to separate the bits into fine powder to simulate powder sugar; and into slightly grainier bits to simulate granulated sugar. I dusted one donut with powdered sugar and smothered another in granulated sugar. Problem solved.
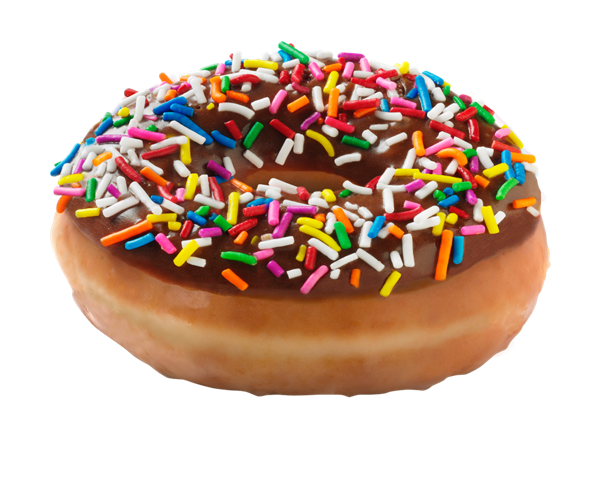
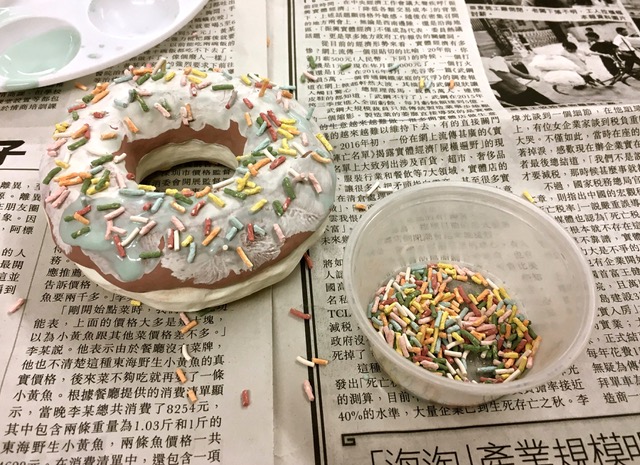
I found colorful food items to be very attractive subjects. This picture of a donut covered with multi-color jimmies is enticing to most people. I wanted to recreate this in ceramics.
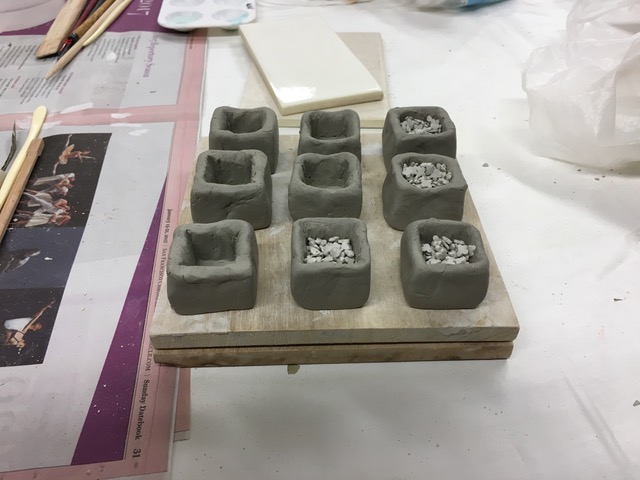
I extruded white clay into thin threads and fired at cone 05. Then I broke the bisque threads into short segments.
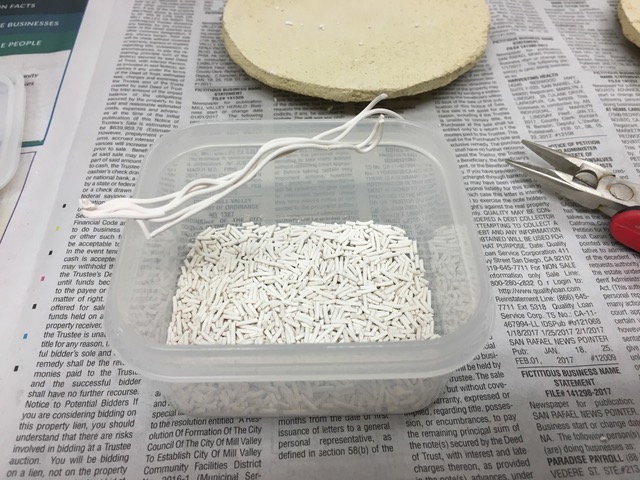
I coated these short segments in different colors such as red, green, yellow; and fired them again at cone 05. Often the bits would not be completely covered in color. I had to coat them again and fire them a third time to become colorful jimmies
I used clear gloss glaze as adhesive to glue the jimmies onto this donut. When fired, the glaze would become transparent and only the colorful jimmies would appear.
Using these techniques, I made a variety of donuts. Many people expressed their wish to bite them.
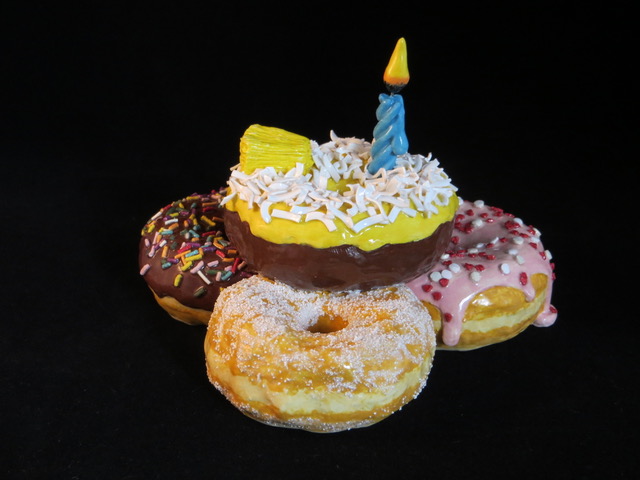
As I developed these techniques, I created this Birthday Donuts as a completion project.
Please click and see some of my ceramic creations in: robertwuart.com
*****************************************
Note: If you enjoy reading this blog, feel free to forward it to your friends. But please do not modify this blog in any manner.
I am in awe of your work in “edible” ceramics! Your have certainly captured the appreciation that “food is art”!!! Robert, where are your pieces now? or have they all found new homes?